

There is a reason why some Christmas trees stop you in your tracks the moment you walk into a room. It is not always the ornaments. It is not the tree skirt or the topper. Nine times out of ten, it comes down to the lighting. The way the light glows from deep inside the branches, the even warmth it casts across the whole tree, the absence of dark patches or awkward clumps of wires — that is what separates a tree that looks professionally decorated from one that just looks decorated.
Most people approach Christmas tree lighting the same way every year. Pull the lights out of the box, start wrapping from the top, run out of string halfway down, squeeze the rest onto the bottom third, and call it done. The result is a tree that is bright in some places and dim in others, with wires cutting across the front and gaps that no ornament can fully hide.
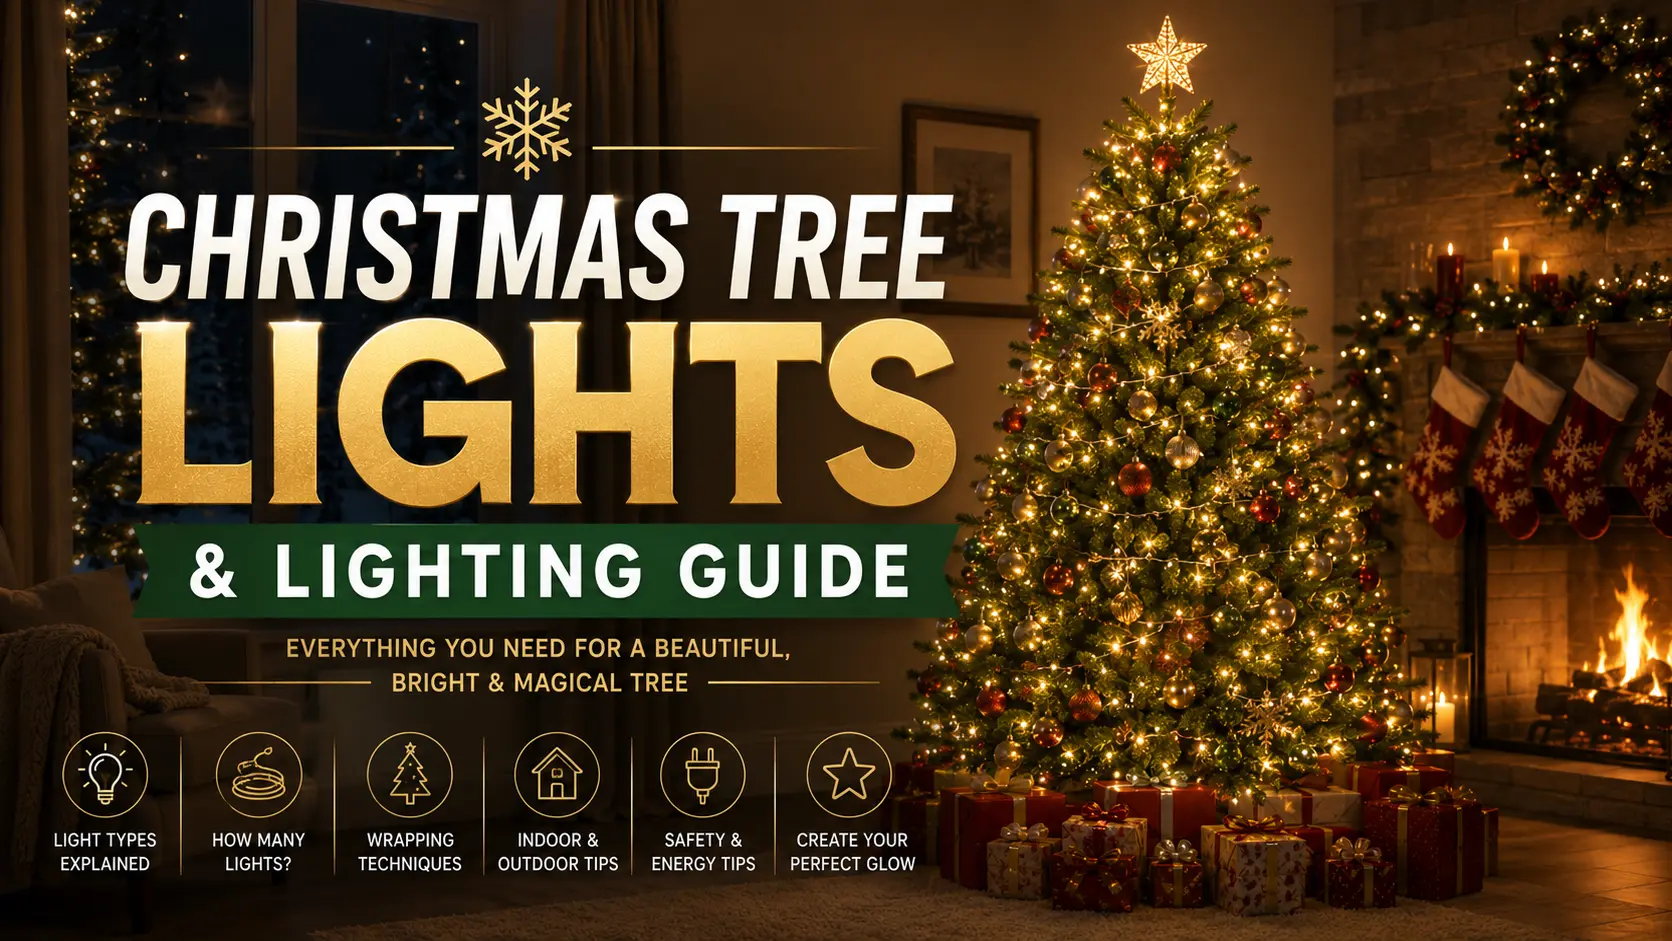
The good news is that professional-looking Christmas tree lighting is not complicated. It just requires the right approach, a bit of planning, and some technique that most people never think about. This guide covers everything from choosing the right lights to the exact method professional decorators use to create that layered, dimensional glow. Whether you are working with a fresh artificial tree or a pre-lit model, the same principles apply.
Choosing the Right Christmas Tree Lights
Before you touch a single branch, the lights you choose will determine the final look of your tree. This decision matters more than most people realize.
LED vs Incandescent Lights
LEDs have become the dominant choice for good reason. They run cooler, use significantly less electricity, and last far longer than incandescent bulbs. They also tend to hold their color consistency better across the entire string, which matters a lot when you are trying to achieve even, balanced lighting across a large tree.
Incandescent lights have a warmth and softness that some people still prefer, particularly for traditional or vintage-style trees. The glow feels slightly more organic. However, they generate more heat, burn out faster, and are harder to find in consistent quality. If you are buying new lights, LED is the practical choice in almost every situation.
For a deeper comparison of both options and which scenarios each performs best in, this LED vs incandescent Christmas lights guide walks through the differences in real-world detail.
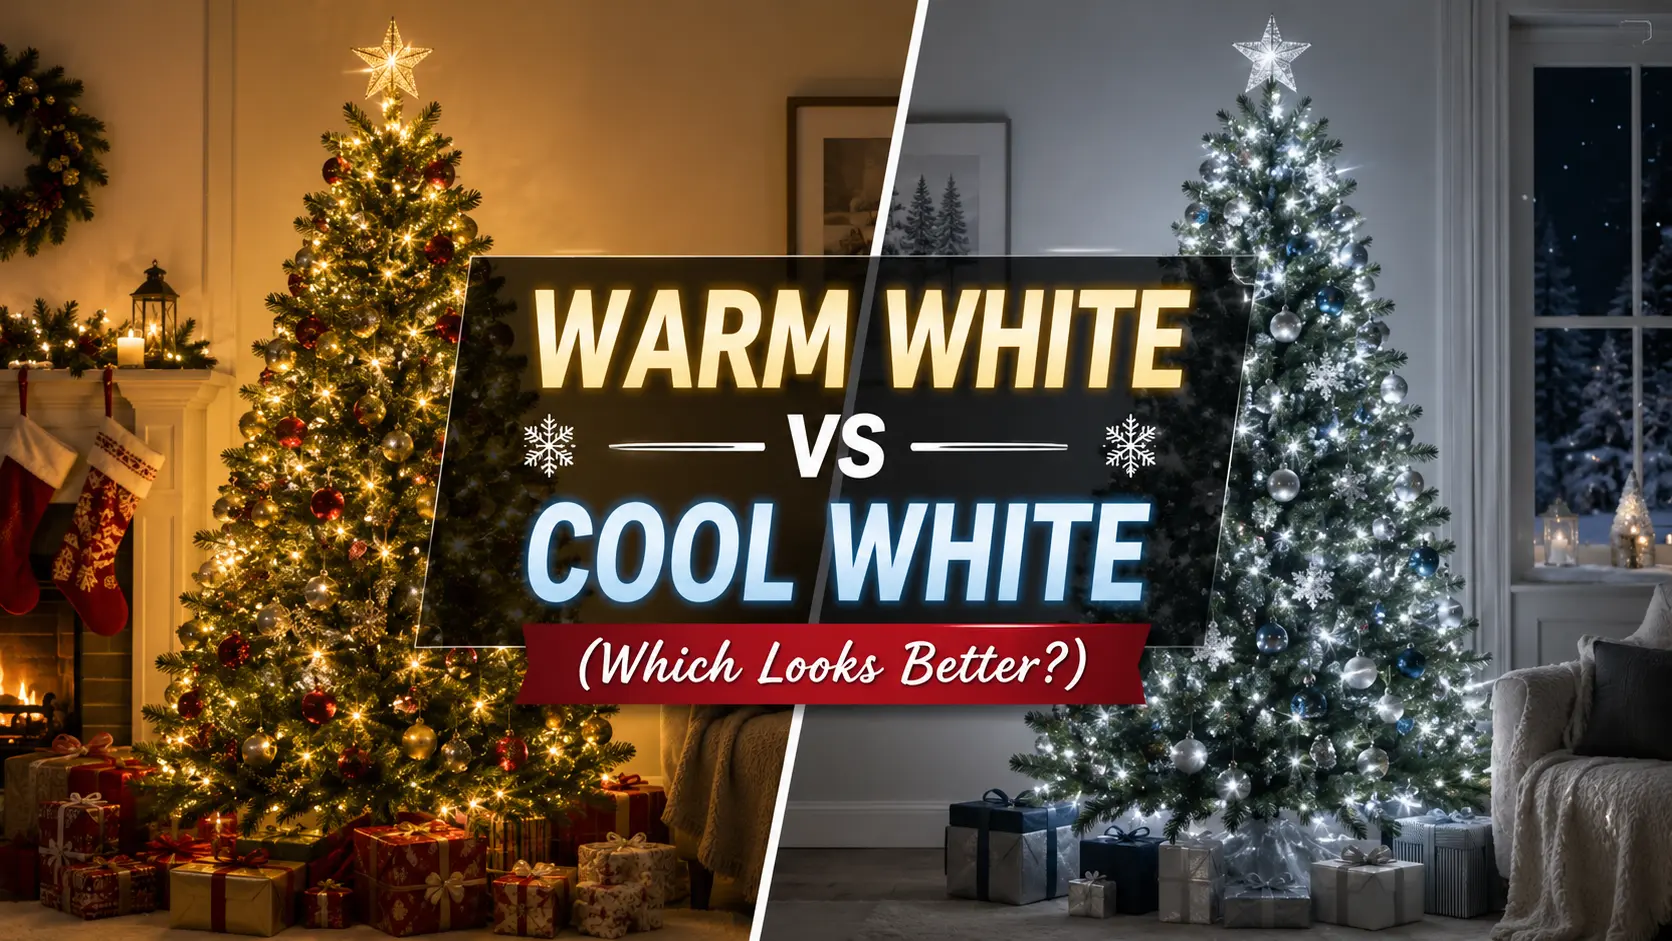
Warm White vs Cool White
This is one of the most important aesthetic decisions you will make. Warm white lights sit in the 2700K to 3000K color temperature range. They produce the amber-tinged glow that most people associate with cozy, traditional Christmas trees. If your ornaments lean toward gold, red, copper, or bronze tones, warm white is almost always the better match.
Cool white lights sit closer to 5000K or above. They give off a crisp, clean, blue-tinted brightness that pairs beautifully with silver, white, and blue decor themes. They also work extremely well on flocked trees, where the cool light plays off the white snow-like coating in a way that feels almost natural.
Mixing both on the same tree can look beautiful when done intentionally, with warm whites deeper in the branches and cool whites on the outer tips. It creates a layered look with surprising depth. For a thorough breakdown of how each tone performs across different decor styles, this warm white vs cool white comparison is worth reading before you buy.
String Length and Brightness
Standard string lights come in 25-foot, 50-foot, and 100-foot lengths. For most trees, 50-foot strings offer the best combination of flexibility and manageability. They are long enough to cover significant depth across the branches without becoming impossible to untangle or work with.
Brightness is often listed in lumens. For indoor trees, you do not need the highest brightness available. A mid-range brightness allows the lights to glow warmly without washing out the color of your ornaments or overwhelming the room.
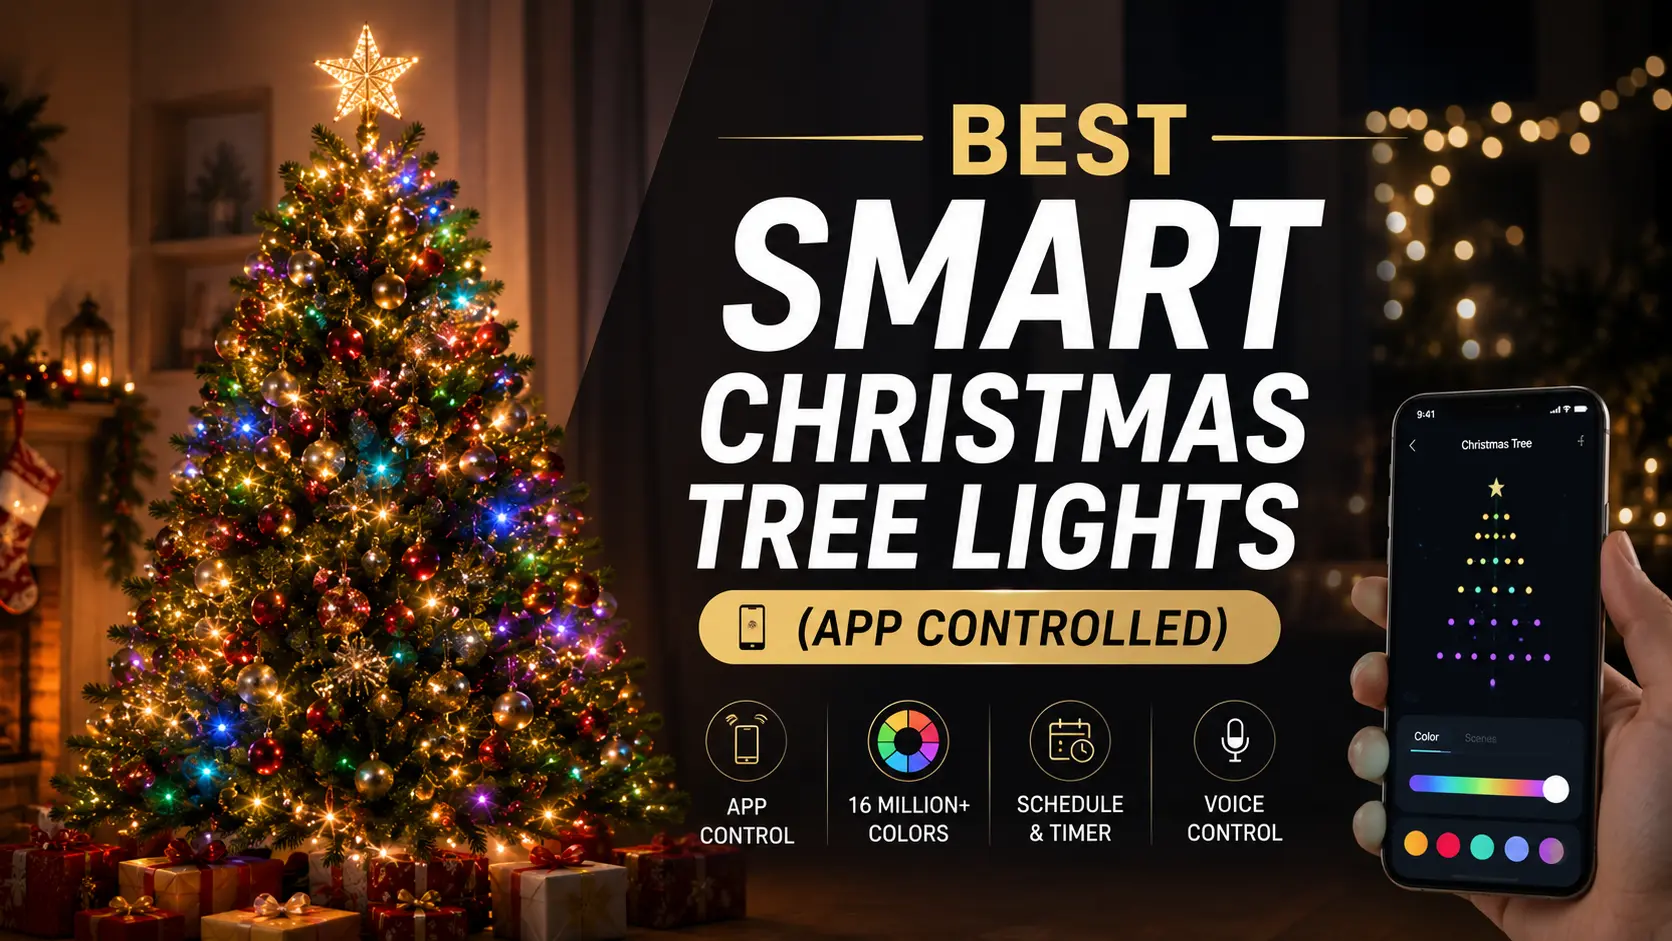
Smart Lights
App-controlled smart lights have become genuinely impressive in recent years. They allow you to change colors, set schedules, sync with music, and create animated lighting effects without touching the tree. For households that want flexibility across different moods or decor themes throughout the holiday season, they are worth the investment. This complete guide to smart Christmas tree lights covers the top options and how to integrate them effectively.
How Many Lights You Actually Need
This is where most people go wrong before they even start wrapping. Too few lights and the tree looks dim, flat, and amateur regardless of how carefully you hang them. Too many crammed in without technique and it becomes a blinding tangle.
The standard recommendation is 100 lights per vertical foot of tree. That means a 7-foot tree needs approximately 700 lights as a baseline. However, this number assumes average branch density and a moderate lighting style. If you want a lush, professional look with depth and glow, plan for 150 to 200 lights per foot.
| Tree Height | Minimum Lights | Professional Look |
|---|---|---|
| 4 feet | 400 | 600-800 |
| 5 feet | 500 | 750-1000 |
| 6 feet | 600 | 900-1200 |
| 7 feet | 700 | 1050-1400 |
| 8 feet | 800 | 1200-1600 |
| 9 feet | 900 | 1350-1800 |
Slim or pencil trees need slightly fewer lights because the branch depth is reduced. Wide or full trees may need more than the professional column suggests, especially near the base where branch span is greatest.
For a more detailed breakdown of light quantities based on tree style and desired brightness, this guide on how many lights you need for a Christmas tree is an excellent reference.
Which Trees Need Different Lighting Techniques
Not all trees light the same way. The type of tree you have should actually influence how you approach the wrapping process.
Flocked Trees
Flocked trees have that signature snow-dusted look, and lighting them well requires a gentler touch. The white coating on the branches reflects light beautifully, which means you do not need to push lights as deeply into the branches as you would on a standard green tree. Placing lights too aggressively inside a flocked tree can melt or disturb the flocking material over time.
The goal with a flocked Christmas tree is balanced, soft illumination that lets the white branches catch and diffuse the light naturally. Cool white or warm white LEDs both work well here. Avoid high-wattage incandescent lights entirely on flocked trees due to heat concerns. For more styling ideas specific to flocked trees, this flocked tree lighting and decor guide is full of practical inspiration.
Pre-Lit Trees
Pre-lit trees already have built-in lights, but that does not mean you are done. The built-in strands on most pre-lit Christmas trees provide a functional baseline glow, but they rarely deliver the layered, dimensional lighting that makes a tree look truly professional. Supplementing with additional string lights woven between the factory strands takes the result to a completely different level.
When adding supplemental lighting to a pre-lit tree, match the color temperature as closely as possible to the existing lights. Mixing warm and cool white from two different sources creates an uneven, inconsistent look. For a detailed look at decorating pre-lit trees effectively, this decoration ideas guide for pre-lit trees is worth bookmarking.
Slim and Pencil Trees
Slim trees require strategic placement because there is far less branch depth to work with. Focus lights along the outer thirds of the branches rather than trying to push them deep into a narrow center. The goal is to create the appearance of depth without the physical space that fuller trees offer. Slightly brighter lights can help here, since they need to project outward more than inward.
Preparing the Tree Before Adding Lights
Skipping this stage is the reason a lot of trees end up looking messy even after careful lighting.
Fluff every branch thoroughly. Artificial trees come compressed for storage, and the branches need to be opened, separated, and shaped before you add a single light. Work from the bottom tier up, pulling each branch away from the center and bending the tip extensions outward and slightly upward. The more time you spend here, the more realistic and full the final tree will look.
Test all your lights before installation. Nothing is more frustrating than finishing the wrapping process only to discover an entire string has a dead section. Plug in every string and check for consistency in brightness and color before anything goes on the tree.
Check for dead or flickering bulbs in pre-lit sections. If you are supplementing an existing pre-lit tree, look for areas where the factory lights are dim or failing. These are the zones that need the most supplemental coverage.
Position the tree correctly first. Once the lights are on, rotating or moving the tree becomes much more complicated without disturbing the strands. Decide on placement, orient the best side toward the room, and lock the stand in place before you start.
Have enough extension cords ready. Calculate how many strings you plan to use and ensure you have enough outlets and safely rated extension cords. Daisy-chaining too many strings through a single outlet is both a fire risk and a cause of uneven brightness.
Horizontal vs Vertical Light Wrapping
This is the technique decision most people never even know exists. There are two main approaches to wrapping Christmas tree lights, and each produces a noticeably different result.
Traditional Horizontal Wrapping
This is the standard approach most people use. You start at one point on the tree and circle around horizontally, moving downward in a spiral from top to bottom. It is simple, intuitive, and works reasonably well on smaller trees.
The limitation of horizontal wrapping is that it tends to keep lights on the surface layer of the branches. You end up with good outer illumination but limited depth, and the tree can look flat when viewed from certain angles.
Professional Vertical Wrapping
Professional decorators typically work in vertical sections rather than horizontal spirals. You divide the tree into vertical panels, like sections of an orange, and light each section individually by moving the string in and out through the depth of the branches as you work downward within that section. Then you move to the adjacent section and repeat.
This method naturally places lights at multiple depths within the branches because you are moving in and out rather than circling around. The result is a tree with genuine dimensional glow — bright at the tips, luminous in the middle, and warm at the core.
Comparison Table
| Method | Depth | Coverage | Difficulty | Best For |
|---|---|---|---|---|
| Horizontal wrapping | Surface-level | Good outer glow | Easy | Small trees, quick setup |
| Vertical sectional | Multi-depth | Full dimensional glow | Moderate | Full-size trees, professional results |
| Combination method | Best depth | Even coverage everywhere | Harder | Large or display trees |
For most trees above 5 feet, the vertical sectional method or a combination approach will produce noticeably better results.
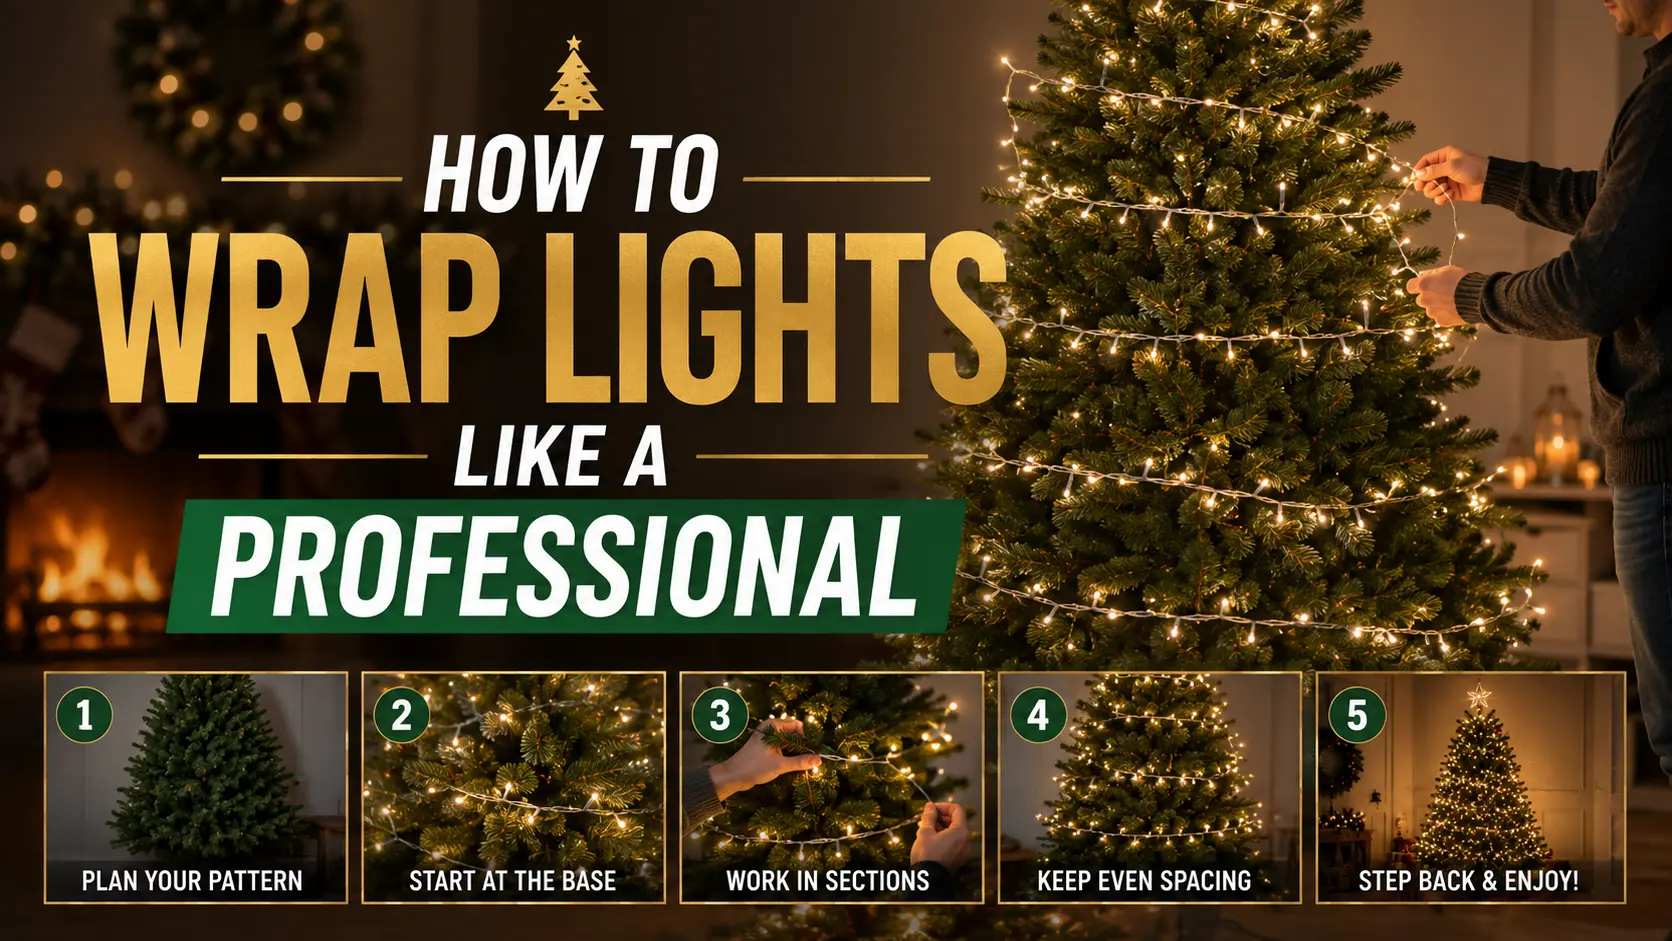
Step-by-Step Professional Light Wrapping Method
This is the core of the entire guide. Follow this process and your tree will look like a professional decorated it.
Step 1: Start at the Trunk, Not the Top
Plug your first string into the extension cord at the base of the tree and secure the plug end near the trunk so it does not dangle. Starting from the base allows you to manage the cord more naturally as you work upward, and it ensures your power source is properly positioned before any lights are placed.
Step 2: Work in Vertical Sections
Mentally divide your tree into four to six equal vertical panels depending on the width of the tree. Begin with the section facing away from the room so you can work toward the front as you gain confidence with the technique.
Step 3: Push Lights Deep into the Branches First
As you begin your first vertical pass, push the string light deep into the interior of the branch tier. Wrap it around a few inner branches close to the trunk. This interior layer is what creates the warm glow from within that makes a tree look professionally lit. Most people skip this step entirely.
Step 4: Work the Lights Outward Toward the Tips
After placing interior lights, bring the string outward toward the branch tips, draping it loosely along the branch length. Let the lights sit naturally on top of and slightly underneath the branches rather than clinging tightly to one surface.
Step 5: Move Down Through the Section, Then Repeat
Work downward through your first vertical section, continuing to alternate between inner and outer branch placement. Once you have completed that section, move to the adjacent panel and continue. If one string ends mid-section, connect the next one and keep going from the same point.
Step 6: Add a Final Outer Pass
Once all the interior and mid-depth lighting is placed, do a final pass with a separate string that focuses purely on the outer branch tips. This layer catches the eye first and gives the tree its immediate visual brightness. The combination of this outer layer with the inner layers you placed earlier is what creates true professional depth.
Step 7: Balance Brightness by Eye
Step back from the tree completely, ideally from the distance someone would normally view it from across the room. Look for dark spots, areas where too many lights are clustered together, or sections where the light seems disconnected from the branches. Make adjustments now before ornaments go on.
Step 8: Tuck and Hide All Visible Wires
Run any visible cords along the back side of branches toward the trunk. Use the natural fork of a branch to hold a cord in place rather than leaving it draped across the front face of the tree. The goal is for no cord to be visible from the front viewing angle.
Advanced Professional Lighting Tips
Once you have the fundamentals down, these techniques push the result further.
Use the depth lighting technique intentionally. Place one string of lights as deeply into the branches as physically possible, essentially touching the trunk. This creates a warm core glow that makes the entire tree appear to be lit from within. It is the single biggest difference between average and exceptional tree lighting.
Layer multiple string types. Using one set of warm white lights deep in the branches and a second set of cooler white or even colored lights on the outer branches creates a naturally complex, layered effect that is difficult to replicate with a single string type.
Avoid dark spots with systematic checking. After each vertical section, step back and identify any dark areas before moving on. It is far easier to correct uneven lighting section by section than to try and fix the whole tree at the end.
Create dimension through branch angle. Tilt some outer branch tips slightly downward when placing lights on them. The light will catch and reflect differently on branches at varying angles, adding natural variation that looks more organic.
Consider lighting for photography. If you plan to photograph your tree, warmer, slightly dimmer lighting tends to photograph better than high-brightness cool white. The camera sensor handles warm tones more naturally, and slightly lower brightness reduces blown-out highlights in the image.
Best Lighting Styles for Different Decor Themes
Luxury Trees
Warm white LEDs, used generously at 200 or more lights per foot, with a focus on deep interior placement. Gold and champagne-toned ornaments reflect the warm glow beautifully. Avoid colored lights entirely.
Minimalist Trees
A single string of warm white or cool white lights placed sparingly but strategically. The point is deliberate simplicity. Space the lights more than you think you should and let the tree breathe.
Farmhouse Trees
Warm white Edison-style or globe lights work exceptionally well here. They have a vintage character that pairs with burlap, wooden ornaments, and natural textures. Keep placement relaxed and slightly imperfect.
Scandinavian Trees
Cool white lights with clean, even spacing. This style leans into simplicity and geometric balance. The light should feel airy and clean rather than dense or warm.
Modern RGB or Smart Light Setups
App-controlled multicolor lights allow you to shift the entire mood of the tree throughout the season. A deep interior layer of warm white combined with outer-layer RGB capability gives you flexibility without sacrificing depth. This complete guide to the best pre-lit tree decorating approaches covers how modern lighting systems integrate with different tree styles.
Common Christmas Tree Lighting Mistakes
Uneven spacing. Lights clustered in certain areas and absent in others create a patchy look that no ornament arrangement can fix. Even spacing across the full tree is more important than absolute quantity.
Too few lights. The most common mistake. A tree that is underpowered with lights will always look dim and flat regardless of the ornaments on it. When in doubt, add another string.
Wrapping only on the surface. Keeping lights on the outermost branch tips creates a flat, two-dimensional look. Professional lighting always has an interior component.
Mixing incompatible light tones. Using warm white from one brand and cool white from another creates a jarring, inconsistent look. Match color temperatures carefully when buying multiple strings, and check them side by side before installation.
Ignoring extension cord safety. Overloading a single outlet or using underrated extension cords with high-draw incandescent lights is a genuine fire risk. Always check the amp rating of your cords against the total draw of your lights, and use a surge-protected power bar where possible.
Starting without testing. Every string should be tested and verified before going on the tree. Discovering a faulty string after the tree is fully decorated means a full unraveling.
Final Professional Lighting Checklist
Use this before you start decorating and again once the lights are in place:
Before you begin:
- All light strings tested and confirmed working
- Correct number of lights purchased for tree size and desired density
- Extension cords rated appropriately for the load
- Tree fully fluffed and positioned correctly
- Power source location confirmed and accessible
During installation:
- Starting at the trunk with power connection secured
- Interior branch layers placed before outer layers
- Lights worked in vertical sections, not horizontal spirals
- Wires hidden along the back of branches toward the trunk
- Each section checked for dark spots before moving on
After installation:
- Step back and view the tree from normal room distance
- All major dark spots identified and corrected
- No visible wires from the front viewing angle
- Color temperature consistent across all strings
- Power consumption within safe limits for the outlet
Conclusion
Lighting is the foundation of every well-decorated Christmas tree. Ornaments, ribbons, and toppers add personality, but it is the light underneath all of that which determines whether the tree glows or just sits there. The difference between a tree that earns compliments and one that blends into the background almost always comes down to how thoughtfully the lights were placed.
The techniques in this guide — deep interior placement, vertical section wrapping, layered string types, and careful spacing — are not complicated. They just require slowing down and being deliberate about something most people treat as a quick task. Do it right once, and you will never go back to the spiral-and-hope method again.
Experiment with layering different warmth levels. Push lights deeper into the branches than feels necessary. Step back often and trust your eye. The result will be a tree that genuinely looks like it belongs in a holiday showroom.
Frequently Asked Questions
Do I start wrapping Christmas tree lights from the top or the bottom? Professionals typically start from the bottom of the tree and work upward. This allows you to manage the power cord more naturally by keeping it near the base where it connects to the outlet. Starting at the top and working down can cause the cord to hang awkwardly or require awkward maneuvering once you reach the lower sections.
How do I keep Christmas tree lights from tangling during installation? Work with one string at a time and unroll it completely before you begin. Lay the full string on the floor, check it for knots, and then feed it onto the tree without letting it pool or loop. Keeping the string taut as you work prevents most tangles from forming mid-installation.
Can I mix warm white and cool white lights on the same tree? Yes, and when done intentionally it can look excellent. The most effective approach is to place warm white lights deep in the interior branches and cool white on the outer tips. This creates a natural gradient effect that adds depth. Avoid mixing them randomly or in equal amounts on the same branch, which tends to look inconsistent rather than intentional.
How do I prevent dark spots on my Christmas tree? The most reliable method is to work in vertical sections and check each one before moving on. After completing each section, step back and look for areas where light is absent or significantly dimmer than surrounding areas. Fix them before adding ornaments, since ornaments make light adjustments dramatically harder.
Is it safe to leave Christmas tree lights on overnight? LED lights are generally safe for extended use and run much cooler than incandescent bulbs. However, the general recommendation from fire safety organizations is to turn lights off when sleeping or leaving the house. Using a timer outlet resolves this completely and also saves energy by keeping the lights off during daylight hours when they are not visible.
How do I hide Christmas tree light wires effectively? Route any visible cords along the underside of branches toward the center trunk. Use the natural fork points where branches meet the central pole to anchor cords in place. If a cord must cross from one side of the tree to the other, run it along a branch close to the trunk where it will be hidden by outer branches and ornaments.
What is the best way to store Christmas tree lights to avoid damage? Wind each string individually around a flat piece of cardboard or a light reel spool. Avoid stuffing multiple strings into the same bag or box, which causes tangling and can damage the connections. Store in a cool, dry location and keep the plugs accessible so you can test them quickly next season before installation.